In this article we will talk about such important setting in BIOS, like Launch csm. It may also be called CMS Boot, UEFI and Legacy OS, CMS OS and is usually located in the BOOT section. You will learn what it affects and when it should be activated.
What does Launch CSM do?
This option stands for Launch Compatibility Support Module, which translated into English means “Launch Compatibility Mode Support Module”. Simply put, Launch csm, when switched to “Enabled” mode, activates a special extended compatibility mode. This mode allows you to boot and install different versions of older operating systems, which already include Windows 7.
Please note that in most laptops that come with a pre-installed version of Windows, you also need to disable the Secure Boot mode.
When should you enable Launch csm?
When are you going to reinstall Windows this It is better to activate the option, because in most cases it is disabled by default. Otherwise, it is possible that you simply will not boot from your bootable media or it will not be in the list of bootable devices.
launch csm in disabled state

launch csm in UEFI
It is also worth considering that Launch csm is first activated by switching to the Enabled state, then the changes are saved and the computer is rebooted. Next, you again and only now change the download priorities for Windows installations.
Good day.
Quite often, many users ask questions about Secure Boot (for example, this option sometimes needs to be disabled when installing Windows). If you do not disable it, then this protective function (developed by Microsoft in 2012) will check and search for special information. keys that are available only for Windows 8 (and higher). Accordingly, you will not be able to boot the laptop from any media...
In this short article I want to look at several popular brands laptops (Acer, Asus, Dell, HP) and show with an example how to disable Secure Boot.
Important note! To disable Secure Boot, you need to go into the BIOS - and to do this you need to press the corresponding buttons immediately after turning on the laptop. One of my articles is devoted to this issue -. It contains buttons for different manufacturers and describes in detail how to enter the BIOS. Therefore, in this article I will not dwell on this issue...
Acer
(Screenshots from the BIOS of the Aspire V3-111P laptop)
After entering the BIOS, you need to open the “BOOT” tab and see if the “Secure Boot” tab is active. Most likely, it will not be active and cannot be changed. This happens because the administrator password is not set in BIOS section"Security".
To install it, you should open this section and select “Set Supervisor Password" and press Enter.
Actually, after this you can open the “Boot” section - the “Secure Boot” tab will be active and can be switched to Disabled (i.e. turned off, see screenshot below).
After rebooting the laptop, it should boot from any* boot device (for example, from a USB flash drive with Windows 7).
Asus
Some models of Asus laptops (especially new ones) sometimes confuse novice users. In fact, how can you disable secure boot in them?
1. First, go to the BIOS and open the “Security” section. At the very bottom there will be an item “ Secure Boot Control" - it needs to be switched to disabled, i.e. turn off.
2. After rebooting, enter the BIOS again and then in the “Boot” section do the following:
- Fast Boot - switch to Disabled mode (i.e. disable fast boot. The tab is not available everywhere! If you don’t have it, then just skip this recommendation);
- Launch CSM - switch to Enabled mode (i.e. enable support and compatibility with “old” OS and software);
- Then press again F10- save the settings and reboot the laptop.
3. After the reboot, enter the BIOS and open the “Boot” section - in the “Boot Option” item you can select the bootable media that is connected to USB port(For example). Screenshot below.
Then save the BIOS settings and reboot the laptop (F10 button).
Dell
(Screenshots from laptop Dell Inspiron 15 3000 Series)
In Dell laptops, disabling Secure Boot is probably one of the simplest - just one entry into Bios is enough and no administrator passwords, etc. are needed.
After entering the BIOS, open the “Boot” section and set the following parameters:
- Boot List Option - Legacy (with this we enable support for older operating systems, i.e. compatibility);
- Security Boot - disabled (disable secure boot).
Actually, you can then edit the download queue. Most install a new Windows OS from bootable USB flash drives- therefore, below is a screenshot of which line needs to be moved to the very top so that you can boot from a flash drive ( USB Storage Device).
After the settings have been entered, press the button F10- this will save the entered settings, and then the button Esc- thanks to it you will exit the BIOS and reboot the laptop. Actually, that’s it for disabling secure boot on Dell laptop- completed!
HP
After entering the BIOS, open the “System Configuration” section, and then go to the “Boot Option” tab (see screenshot below).
After the reboot, the text “A change to the operating system secure boot mode is pending...” appears.
We are warned about changes made to the settings and are asked to confirm them with a code. You just need to enter the code shown on the screen and press Enter.
After this change, the laptop will reboot and Secure Boot will be disabled.
To boot from a flash drive or disk: when you turn on the HP laptop, press ESC, and in the start menu select “F9 Boot Device Options”, then you can select the device from which you want to boot.
In principle, in laptops of other brands, disabling Secure Boot proceeds in the same way, there are no special differences. The only point: on some models, entering the BIOS is “complicated” (for example, in laptops Lenovo- you can read about this in this article:). I'll wrap this up, all the best to everyone!
Secure Boot(secure boot or secure boot) is one of the UEFI features that allows you to fight rootkits and bootkits (which exploit vulnerabilities in BIOS firmware) even at the preliminary stage of loading the OS. Secure boot technology is one of the layers of defense in the new Microsoft operating systems - Windows 8 and Windows Server 2012. In this article we will look at the practical and theoretical aspects of the work Secure boot in Windows 8(also relevant for Windows Server 2012).
It's no secret that in modern systems OS loading is one of the most vulnerable components from a security point of view. An attacker just needs to transfer the bootloader functions to his own (“malicious”) bootloader, and such a bootloader will not be detected by the OS security system and anti-virus software.
The Secure Boot feature in Windows 8 allows you to organize a check of all launched components (drivers, programs) during the boot process (before starting the operating system), ensuring that only trusted (with digital signature) programs can run while Windows is starting. Unsigned code and code without proper security certificates (rootkits, bootkits) are blocked by UEFI ( however, this protection system can also be bypassed; remember the Flame worm, signed with a fake Microsoft certificate). If a component without a digital signature is detected, it will automatically launch Windows service Recovery, which will try to make changes to Windows by restoring the necessary system files.
Advice. What should I do if, after upgrading to Windows 8.1, the message “?” appears on the desktop in the lower right corner?
It is worth clearly understanding that to use secure boot technology, the UEFI system must be used instead of BIOS on the PC (what this is is described in the article). In addition, the motherboard firmware must support the specification UEFI v2.3.1 and have a certification authority certificate in your UEFI signature database Microsoft Windows(or OEM dealer certificates hardware, certified by Microsoft). All new computers with Windows 8 (64-bit) pre-installed that receive the “ Windows 8 ready", as requested by Microsoft, Necessarily require active Secure Boot. Also note that Windows 8 for ARM (Windows RT) cannot be installed on equipment that does not support UEFI or that allows you to disable Secure Boot. For secure boot or ELAM to work, the TPM (trusted platform module) module not required!
Another component of Windows 8 Secure Boot is ELAM(Early-launch Anti-Malware - early-launch anti-malware technology) provides anti-virus protection even before the computer has finished booting. Thus, a certified antivirus (meaning products from various vendors, not just Microsoft) begins to work even before the malware has a chance to run and hide its presence.
Setting up Secure Boot in Windows 8
Let's try to figure out how to organize a secure boot of Windows 8 on a new computer (assuming that we have a boxed version of Windows 8, not a pre-installed OEM version). The maternal mother was chosen for the experiment. Asus board P8Z77 with UEFI support (and Windows 8 ready sticker). It should be understood that in another motherboard specific screenshots and options will most likely differ, the main thing is to understand the basic principles of installing Windows 8 with secure boot on a new computer
The system is planned to be installed on SSD drive, therefore in BIOS settings(actually it's UEFI) as SATAModeSelection let's ask AHCI. ()


To install Windows 8 in UEFI mode, we need either a bootable DVD disc(physical) with Win 8 distribution, or bootable usb A flash drive with Windows 8 (formatted in FAT32) prepared in a special way (), because A bootable USB flash drive with NTFS in UEFI will not work. It is worth noting that installing Windows 8 from a flash drive to an SSD drive only took about 7 minutes!
Unplug your computer, plug it in boot disk(flash drive) and turn on the computer. You will see a screen for selecting boot options (UEFI Boot menu), where you need to select your boot device(the option is visible in the screenshot Windows Boot Manger, but in reality you will only have it after installing the system in EFI mode).

Let's take a closer look at the disk partitioning parameters for the system. EFI and secure boot require the disk to be in GPT mode (not MBR). In the event that the disk is not marked, there is no need to perform any further manipulations with diskpart, the system will do everything itself. If the disk is partitioned, delete them, because... For UEFI to work with secure boot, you need four special partitions, which the installer will create automatically.

It is assumed that we want to use the entire disk under Windows 8, so we just click Next without creating any partitions. Windows will automatically create four partitions of the required size and give them names:
- Recovery– 300 MB
- System– 100 MB – EFI system partition containing NTLDR, HAL, Boot.txt, drivers and other files necessary to boot the system.
- MSR (Reserved)– 128 MB – Microsoft Reserved (MSR) partition, which is created on each disk for later use operating system
- Primary– all the remaining space is the partition where Windows 8 is actually installed

Next, install Windows 8 as usual. Once Windows is installed, you can use Powershell to verify that Secure Boot is being used by command line with administrator rights run:
Confirm-SecureBootUEFI
If secure boot is enabled, the command will return TRUE (if it returns false or the command is not found, it means it is disabled).

So, we have successfully installed Windows 8 in Secure Boot mode with UEFI.
WITH Windows release 8, manufacturers have begun to more actively implement the successor to the BIOS - the UEFI interface, which has already managed to cause a lot of trouble during its existence. We will tell you how, despite this, to take advantage of its benefits.
The massive transition to UEFI (Unified Extensible Firmware Interface) has already begun. Microsoft requires this interface to be used on all computers that will ship with Windows 8. More precisely, we are talking about UEFI with the Secure Boot feature. At the same time, only “eight” can work on such PCs without problems: neither Windows XP nor “seven” can be installed on a UEFI machine without additional manipulations.
You won't be able to boot from a Linux Live or Windows flash drive either. What exactly can happen if you try to start from an installation flash drive on a laptop? Sony VAIO, shown in the picture above. And the problems with UEFI don't end there. Each hardware component manufacturer configures UEFI at its own discretion, thereby creating unnecessary difficulties for the user. The IdeaPad laptop from Lenovo was not able to recognize the same flash drive as boot media at all. At the same time, Lenovo has nothing to reproach: the fact is that the bootable flash drive is formatted in file system NTFS, and UEFI does not support booting from such media. If you connect the same drive to an EliteBook laptop from HP, it will boot without problems and allow you to install Windows. The problem is that all the data on the EliteBook disk would be deleted after installation.
Everyone configures differently
Are you confused? No wonder: UEFI with Secure Boot establishes new rules for installing and booting operating systems, and hardware manufacturers interpret these rules in their own way, which creates additional difficulties for the user. Therefore, in this article, we set ourselves the goal of clearing up the confusion around UEFI. Using laptops from major manufacturers as an example, we will tell you how UEFI works, what role the Secure Boot function plays, how to bypass the “traps” set by the new interface, and what you need to use bootable flash drives without fear of any destructive consequences.
How UEFI works
UEFI boots strictly according to established rules. If the OS does not support UEFI, BIOS emulation mode is activated. The process of booting a BIOS-based PC is quite simple: after pressing the power button, the BIOS starts, which checks the status of the hardware and loads the firmware - simple drivers for individual hardware components. The BIOS then searches for the OS bootloader and activates it. This in turn loads the operating system or displays a list of available operating systems.
UEFI-based computers boot in a similar way only until the boot options are searched. After this, everything happens differently. UEFI has its own OS bootloader with integrated launch managers installed systems. For it, a small partition (100–250 MB) is created on the disk, formatted in the FAT32 file system, which is called Extensible Firmware Interface System Partition (ESP system partition). It contains drivers for hardware components that can be accessed by the running operating system. General rule This is: with the exception of DVDs, UEFI can only boot from media formatted with the FAT32 file system.
UEFI is a complex mechanism
ESP has its advantages: thanks to UEFI drivers and the OS loader, Windows starts faster and responds more adequately to critical errors drivers. But the UEFI interface also imposes restrictions: it allows you to install the OS only on hard drives that are marked according to the GPT standard. The latter is not supported by any BIOS version, since, unlike the traditional partitioning scheme (MBR), it uses 64-bit sector addresses. In addition to Windows 8, only 64-bit versions support the UEFI interface Windows Vista and 7, as well as Linux with kernel 3.2 and higher. Moreover, for PCs certified to work with G8, Microsoft requires the use of the Secure Boot option. In this mode, UEFI only launches verified OS boot loaders that contain Microsoft digitally signed drivers.
Along with Windows 8, only the Shim bootloader (Linux) has drivers with the necessary signatures for Secure Boot. They are not available in other OSes. Therefore, if you want to install Windows 7 or Vista on such a computer, in addition to G8, you need to open the UEFI menu and disable Secure Boot. If you choose a non-UEFI compatible OS as your second OS, you will need to use the Compatibility Support Module (CSM), which can be enabled in UEFI. Unfortunately, manufacturers use different versions of UEFI, and it can sometimes be difficult to figure out how to disable Secure Boot and enter BIOS emulation mode. We will consider these questions further.
UEFI based PC boot process
Depending on the configuration, UEFI either boots the computer itself or goes into emulation mode of the standard BIOS. Only after this does the Windows Boot Manager start.
Installing Windows on a PC with UEFI and Secure Boot On a Windows 8-based PC UEFI Secure Boot other versions of the OS can be installed only under certain conditions. The user must select the correct boot mode in advance and prepare the installation flash drive accordingly.
 Enabling BIOS emulation mode Complete confusion: the method for entering BIOS emulation mode depends on the UEFI version. On Sony VAIO (1) you need to activate the “Legasy” option, on ASUS Zenbook (2) - “Launch CSM”.
 UEFI setup
Each manufacturer uses its own version of UEFI in laptops and ultrabooks. However, it does not provide access to everyone. necessary functions. Often, when loading a PC or laptop, the display does not display the name of the button that can be used to open the UEFI settings menu. We suggest doing the following: in the Metro interface, go to the “Options | Change PC settings" in the sidebar and activate the "General | Special download options." After the restart, the OS boot manager will appear, which will allow you to open the UEFI menu. The exception is HP's UEFI, where this option absent. The following will help: while loading, hold down the "Esc" key. In any case, you must first find out which button allows you to enter the UEFI menu. If you change the boot mode to CSM or Legasy BIOS to boot from a rescue flash drive, you must switch back from CSM to UEFI after the recovery operation, otherwise Windows 8 will not start. But there are exceptions here: Aptio Setup Utility on ASUS computers activates UEFI automatically in the absence of BIOS-compatible bootable media, so you just need to disconnect the flash drive.
Disabling Secure Boot will be required if, in addition to G8, you want to install a 64-bit Windows version Vista or 7. Sometimes the so-called hybrid mode is supported, as in devices from HP, in which UEFI can boot from all bootable media and, if necessary, switch to BIOS mode. In the widely used UEFI version InsydeH2O, this depends on whether the laptop manufacturer has provided the ability to disable Secure Boot or not. In Acer Aspire S7 this function is not available, and to deactivate it you need to switch from UEFI to BIOS mode and back.
Difficulties with recovery
With the advent of UEFI, manufacturers changed the way they work with the OS recovery system. The “Alt+F10” keyboard shortcut, which was previously used, for example, in Acer models, no longer works or is assigned to other functions. And the “F9” button loads on the new Zenbook not the ASUS Preload Wizard, but the program Windows recovery 8 with extended boot menu.
Mode VAIO recovery Care in Sony laptops can be opened in a similar menu by selecting the “Control Panel | Troubleshooting | Recovery". But if you launch the OS boot manager and select “Diagnostics | Restore" or "Restore to original state", the device will ask you to insert the original Windows disk 8, which is not included in the package. On Acer models, backup is performed using a pre-installed Windows program, and restoration from backup copy carried out from an external USB drive. However, you must first go to the UEFI menu and specify such a disk as a boot one.
Going to the UEFI menu from Windows
If the function is activated Windows startup 8 with advanced settings, then by selecting “Diagnostics” (1) and “ Additional options"(2), you can access the UEFI Firmware Settings menu (3).
 Useful features UEFI Every laptop manufacturer uses different versions interface UEFI and implements it in the system in accordance with its ideas. The table, broken down by model, will show you where the main UEFI features are located.
 Solving the problem: disabling Secure Boot In some cases, Secure Boot cannot be deactivated directly. In Acer Aspire S7, for example, this function is not available. But if you switch to “Legacy BIOS” (1) and back again (2), Secure Boot will be disabled.
 Everything is possible in hybrid mode. HP's version of the UEFI interface supports hybrid mode, in which, depending on the boot media, one of two modes is launched - either UEFI or CSM. In this case, the Secure Boot function is disabled automatically.
 Run from a flash drive
Old flash drives for emergency boot and recovery only work in BIOS mode. We will make them UEFI compatible.
USB flash drives have recently become increasingly used as bootable media for restoring or installing Windows. This is due to the fact that modern laptops rarely have optical drives. If you have studied UEFI settings on your computer, it is also recommended to upgrade your flash drives. With the advent of UEFI, all existing bootable flash drives can no longer be used in the usual way. For example, if you created a bootable USB media using UNetbootin, you will need to start your PC in CSM mode. The same applies to all old flash drives, since the developers Linux distributions Live (for example, GParted) only began to add a bootloader with UEFI support and Secure Boot functions in the latest, most recent versions of their applications.
The simplest method is to disable Secure Boot in UEFI, then use the free Rufus programs a UEFI-compatible flash drive is created and then copied to it latest version GParted.
The Microsoft program is outdated
Regarding bootable USB media with operating system Windows system slightly different rules apply. To be UEFI compatible, they must be formatted with the FAT32 file system. Many users even create for Windows 8 boot drives on flash drives formatted using a program from Microsoft, part of the “seven”. However this application by default formats the drive as a file NTFS system, as a result of which the system on the media cannot subsequently be installed on a computer with UEFI. To avoid waiting for an updated program from Microsoft, you can create a bootable drive manually. To do this, first format the USB flash drive using a free utility. Then open the ISO image in Windows 8 and copy the files it contains to the media.
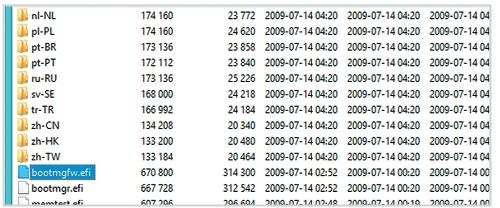
But in order for a UEFI-compatible flash drive with 64-bit Windows 7 to boot without any problems, you will need to copy the UEFI boot loader to the desired directory on the flash drive. To do this, using the free 7-Zip archiver, search in ISO image, which contains installation Windows files 7, in the Sources folder, install the archive file Install.wim and open it. After that, copy the bootmgfw.efi file from the 1WindowsBootEFI directory. Then save it to your flash drive in the efiboot directory and rename it bootx64.efi. After this, you can work with the USB drive in UEFI mode, and you will be able to install Windows 7 from it without any problems.
Creating bootable flash drives based on Live systems
To be compatible with UEFI, flash drives must be formatted in FAT32. For example, the UNetbootin (1) program creates bootable drives based on Linux Live distributions, formatting them in FAT. However, the Rufus utility (2) offers a more correct option.
 Flash drive for OS recovery on UEFI PC Flash drives based on fresh Live systems, such as GParted, are able to access UEFI PCs without any problems, as they have built-in tools such as GPart (1) and TestDisk ( 2) - can work with GPT partitions.
 Formatting bootable flash drive With Windows, the 64-bit version of Windows 7 can be installed on a PC with UEFI. If you want to perform this operation from a USB drive, you need to format it using the Windows DiskPart program in the FAT32 file system and make it bootable.
 Removing the UEFI Boot Loader A UEFI-compatible flash drive running Windows 7 additionally needs a UEFI boot loader - bootmgfw.efi. It must be manually copied from the install.wim archive to a flash drive using 7-Zip or any other archiver.
The massive transition to UEFI (Unified Extensible Firmware Interface) has already begun. Microsoft requires this interface to be used on all computers that will ship with Windows 8. More precisely, we are talking about UEFI with the Secure Boot feature. At the same time, only “eight” can work on such PCs without problems: neither Windows XP nor “seven” can be installed on a UEFI machine without additional manipulations. You won't be able to boot from a Linux Live or Windows flash drive either. What exactly can happen if you try to start from the installation flash drive on a Sony VAIO laptop is shown in the picture above. And the problems with UEFI don't end there. Each hardware manufacturer configures UEFI at its own discretion, thereby creating unnecessary difficulties for the user. The IdeaPad laptop from Lenovo was not able to recognize the same flash drive as boot media at all. At the same time, Lenovo has nothing to blame: the fact is that the bootable flash drive is formatted in the NTFS file system, and UEFI does not support booting from such media. If you connect the same drive to an EliteBook laptop from HP, it will boot without problems and allow you to install Windows. The problem is that all the data on the EliteBook disk would be deleted after installation.
Everyone configures differently
Are you confused? No wonder: UEFI with Secure Boot establishes new rules for installing and booting operating systems, and hardware manufacturers interpret these rules in their own way, which creates additional difficulties for the user. Therefore, in this article, we set ourselves the goal of clearing up the confusion around UEFI. Using laptops from major manufacturers as an example, we will tell you how UEFI works, what role the Secure Boot function plays, how to bypass the “traps” set by the new interface, and what you need to use bootable flash drives without fear of any destructive consequences.
How UEFI works
UEFI boots strictly according to established rules. If the OS does not support UEFI, BIOS emulation mode is activated. The process of booting a BIOS-based PC is quite simple: after pressing the power button, the BIOS starts, which checks the status of the hardware and loads the firmware - simple drivers for individual hardware components. The BIOS then searches for the OS bootloader and activates it. This in turn loads the operating system or displays a list of available operating systems.
UEFI-based computers boot in a similar way only until the boot options are searched. After this, everything happens differently. UEFI has its own OS bootloader with integrated launch managers for installed systems. For it, a small partition (100–250 MB) is created on the disk, formatted in the FAT32 file system, which is called Extensible Firmware Interface System Partition (ESP system partition). It contains drivers for hardware components that can be accessed by the running operating system. The general rule is that with the exception of DVDs, UEFI can only boot from media formatted with the FAT32 file system.
UEFI is a complex mechanism
ESP has its advantages: thanks to UEFI drivers and the OS loader, Windows starts faster and responds more adequately to critical driver errors. But the UEFI interface also imposes restrictions: it allows you to install the OS only on hard drives that are marked according to the GPT standard. The latter is not supported by any BIOS version, since, unlike the traditional partitioning scheme (MBR), it uses 64-bit sector addresses. In addition to Windows 8, the UEFI interface is supported only by 64-bit versions of Windows Vista and 7, as well as Linux with kernel 3.2 and higher. Moreover, for PCs certified to work with G8, Microsoft requires the use of the Secure Boot option. In this mode, UEFI only launches verified OS bootloaders that contain Microsoft digitally signed drivers.
Along with Windows 8, only the Shim bootloader (Linux) has drivers with the necessary signatures for Secure Boot. They are not available in other OSes. Therefore, if you want to install Windows 7 or Vista on such a computer, in addition to G8, you need to open the UEFI menu and disable Secure Boot. If you choose a non-UEFI compatible OS as your second OS, you will need to use the Compatibility Support Module (CSM), which can be enabled in UEFI. Unfortunately, manufacturers use different versions of UEFI, and it can sometimes be difficult to figure out how to disable Secure Boot and enter BIOS emulation mode. We will consider these questions further.
UEFI based PC boot process
Depending on the configuration, UEFI either boots the computer itself or goes into emulation mode of the standard BIOS. Only after this does the Windows Boot Manager start.
Installing Windows on a PC with UEFI and Secure Boot
On a PC with Windows 8 based on UEFI Secure Boot, other versions of the OS can be installed only under certain conditions. The user must select the correct boot mode in advance and prepare the installation flash drive accordingly.

Enabling BIOS emulation mode
Complete confusion: the method for entering BIOS emulation mode depends on the UEFI version. On Sony VAIO (1) you need to activate the “Legasy” option, on ASUS Zenbook (2) - “Launch CSM”.

UEFI setup
Each manufacturer uses its own version of UEFI in laptops and ultrabooks. However, it does not provide access to all the necessary functions. Often, when loading a PC or laptop, the display does not display the name of the button that can be used to open the UEFI settings menu. We suggest doing the following: in the Metro interface, go to the “Options | Change PC settings” in the sidebar and activate the “General | Special download options." After the restart, the OS boot manager will appear, which will allow you to open the UEFI menu. The exception is HP's UEFI, which does not have this option. The following will help: while loading, hold down the "Esc" key. In any case, you must first find out which button allows you to enter the UEFI menu. If you change the boot mode to CSM or Legasy BIOS to boot from a rescue flash drive, you must switch back from CSM to UEFI after the recovery operation, otherwise Windows 8 will not start. But there are exceptions here: Aptio Setup Utility on ASUS computers activates UEFI automatically in the absence of BIOS-compatible bootable media, so you just need to disconnect the flash drive.
Disabling Secure Boot will be required if, in addition to G8, you want to install a 64-bit version of Windows Vista or 7. Sometimes the so-called hybrid mode is supported, as in devices from HP, in which UEFI can boot from all bootable media and, if necessary, switch to BIOS mode. In the widely used UEFI version InsydeH2O, this depends on whether the laptop manufacturer has provided the ability to disable Secure Boot or not. In the Acer Aspire S7, this function is not available, and to deactivate it you need to switch from UEFI to BIOS mode and back.
Difficulties with recovery
With the advent of UEFI, manufacturers changed the way they work with the OS recovery system. The “Alt+F10” keyboard shortcut, which was previously used, for example, in Acer models, no longer works or is assigned to other functions. And the “F9” button loads on the new Zenbook not the ASUS Preload Wizard, but the Windows 8 recovery program with an extended boot menu.
The VAIO Care recovery mode in Sony laptops can be opened in a similar menu by selecting the “Control Panel | Troubleshooting | Recovery". But if you start the OS boot manager and select “Diagnostics | Restore" or "Restore to original state", the device will ask you to insert the original Windows 8 disc, which is not included in the package. On Acer models, backup is performed using a pre-installed Windows program, and restoration from a backup is carried out from an external USB drive. However, you must first go to the UEFI menu and specify such a disk as a boot one.
Going to the UEFI menu from Windows
If Windows 8 Advanced Startup is enabled, you can access the UEFI Firmware Options (3) menu by selecting Diagnostics (1) and Advanced Options (2).

Useful UEFI Features
Each laptop manufacturer uses different versions of the UEFI interface and implements it in the system in accordance with their ideas. The table, broken down by model, will show you where the main UEFI features are located.

Solving the problem: disabling Secure Boot
In some cases, Secure Boot cannot be deactivated directly. In Acer Aspire S7, for example, this function is not available. But if you switch to “Legacy BIOS” (1) and back again (2), Secure Boot will be disabled.

Everything is possible in hybrid mode
HP's version of the UEFI interface supports hybrid mode, in which, depending on the boot media, one of two modes is launched - either UEFI or CSM. In this case, the Secure Boot function is disabled automatically.

Run from a flash drive
Old flash boot and recovery media only work in BIOS mode. We will make them UEFI compatible.
USB flash drives have recently become increasingly used as bootable media for restoring or installing Windows. This is due to the fact that modern laptops very rarely have optical drives installed. If you have examined the UEFI settings on your computer, it is recommended that you also upgrade your flash drives. With the advent of UEFI, all existing bootable flash drives can no longer be used in the usual way. For example, if you created a bootable USB media using UNetbootin, you will need to start your PC in CSM mode. The same applies to all old flash drives, since the developers of Linux Live distributions (for example, GParted) only began to add a bootloader with UEFI support and Secure Boot functions in the latest, most recent versions of their applications.
The simplest method is to disable Secure Boot in UEFI, then use free program Rufus creates a UEFI compatible flash drive and then copies the latest version of GParted to it.
The Microsoft program is outdated
For bootable USB drives running the Windows operating system, slightly different rules apply. To be UEFI compatible, they must be formatted with the FAT32 file system. Many users, even for Windows 8, create bootable drives on flash drives formatted using a program from Microsoft, part of the “seven”. However, this application formats the drive with the NTFS file system by default, making the system on the drive subsequently impossible to install on a computer with UEFI. To avoid waiting for an updated program from Microsoft, you can create a bootable drive manually. To do this, first format the USB flash drive using a free utility. Then open the ISO image in Windows 8 and copy the files it contains to the media.
But in order for a UEFI-compatible flash drive with 64-bit Windows 7 to boot without any problems, you will need to copy the UEFI boot loader to the desired directory on the flash drive. To do this, using the free 7-Zip archiver, find the ISO image that contains installation files Windows 7, in the Sources folder, install the archive file Install.wim and open it. After that, copy the bootmgfw.efi file from the 1\Windows\Boot\EFI directory. Then save it to your flash drive in the efi\boot directory and rename it bootx64.efi. After this, you can work with the USB drive in UEFI mode, and you will be able to install Windows 7 from it without any problems.
Creating bootable flash drives based on Live systems
To be compatible with UEFI, flash drives must be formatted in FAT32. For example, the UNetbootin (1) program creates bootable drives based on Linux Live distributions, formatting them in FAT. However, the Rufus utility (2) offers a more correct option.

Flash drive for OS recovery on PC with UEFI
Flash drives based on recent Live systems, such as GParted, can easily access UEFI PCs, since their built-in tools - such as GPart (1) and TestDisk (2) - can work with GPT partitions.

Formatting a bootable USB flash drive with Windows
The 64-bit version of Windows 7 can also be installed on a PC with UEFI. If you want to perform this operation from a USB drive, you need to format it using the Windows DiskPart program as a FAT32 file system and make it bootable.

Removing the UEFI Boot Loader
A UEFI-compatible flash drive running Windows 7 additionally requires a UEFI boot loader - bootmgfw.efi. It must be manually copied from the install.wim archive to a flash drive using 7-Zip or any other archiver.

Source


