How to repost a user's Instagram story? Many of you have seen a cool innovation from Instagram, where any user can repost another’s story. And then this story appears in your feed in a blurry frame. How to do this?
Option 1
If you don't know how to repost a story on Instagram, then you don't even need to log out of your Instagram. Everything is in him. Just recently, Instagram made a huge gift for its users. Now anyone can repost any story to their feed. Here are simple instructions.
How to add someone else's story to yourself on Instagram:

Option 2
If you haven’t found a similar function, then you can only repost the story that in which you were mentioned. The principle of operation is quite simple.
How to repost a story on Instagram:
- Your friend/acquaintance/relative films a story and mentions you in it through @Nick.
- You immediately receive a message in DM that you were mentioned in stories.
- You press “Add this to the story.”
- And your friend’s reposted story appears in your feed.


What if she doesn't exist?
But what to do if there is no function on Instagram? “Add post to your story”?
- Update the application, perhaps this feature has already arrived to you.
- If the application is already updated, then all you have to do is wait until a similar function appears for you. Updates come gradually and not to everyone at once.
- How long to wait? Not clear. It all depends on the Instagram developers.
- Use third-party services that allow you to do similar things.
Third party services
How to repost an Instagram story with blurry frames from another user? The way this is done in the application itself - no way. But there are slightly different ways. Such services only save stories and do not repost them. After downloading the story, you will need to download the story from your account yourself. You can also tag the owner of the story using @Nick.
Useful applications:
- StoryReposter (reposts stories only to your main post feed, but not to history).
Get a standing ovation
Be the most stylish! Use super effects.
Making a story

To go to the publication of stories, you need to swipe from the left to the right side of the screen on home page Instagram (where you read your feed). To take a photo or shoot a video, you need to click on the circle at the bottom of the screen, and by swiping down you can open a window for selecting media from your library. There is another way to create a story: select your account tab (where your photos are shown) and click on the + next to your profile photo.
Shooting modes
Instagram Stories supports five shooting modes.


The choice of filters in Instagram Stories is small, but, as a rule, it is enough. Filters can be changed by swiping left or right.
Supported photo and video format
Photos and videos in Instagram Stories are vertical. Horizontal media files are cropped when imported. To select the desired area of the photo for publication in the story, you can use cropping the frame in a standard photo editor. The maximum video length is 15 seconds. Please note that a longer video will be shortened when imported. You can only upload pictures and videos that were taken in the last 24 hours to your history.
Masks


Another take on Instagram Stories from Snapchat. To go to masks, you need to tap on the icon to the right of the camera change icon.
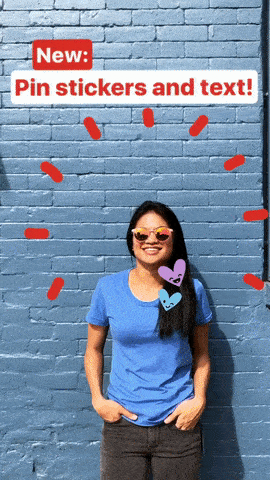
Stickers
To attach a sticker to a story, you need to click on the corresponding icon after taking a photo or simply swipe up on the screen.
Stickers of geoposition, temperature and shooting time


In the first line of the sticker selection screen, you can choose to add geodata to the history, the current temperature in the place where you are, and the time of publication.
Adding a selfie to your story


On the next line of the sticker selection screen there is a camera icon. Choosing such a sticker will allow you to take a selfie and embed it in your story. Moreover, the borders of the photo can be either blurred or emphasized with a white frame. With this feature, you can create funny collages or express your opinion about what is depicted in the story using a happy or judgmental grimace.
Changing sticker size
To make the sticker larger or smaller, use two fingers. Once you've selected a sticker, pinch your fingers together to make it smaller or spread out to make it larger.
Attaching a sticker to a video element

Select any of the stickers, press on it and hold your finger for a couple of seconds. A time slider will appear in front of you. Select the second with the element to which you want to attach the sticker, set the desired location and size of the “sticker” and click “Attach”. Now the sticker will be attached to the selected video object.
Adding hashtags
To assign a hashtag to a story, you can use the creation of a tag in the text, but it is easier to select the corresponding sticker. Tapping on it will change the display style of the hashtag. When your friends see the tag, they can click through to posts tagged with the same tag.
Quick selection of stickers


To avoid scrolling the screen every time in search of your favorite sticker, swipe your finger to the right when selecting it. A list of recently used “stickers” will open in front of you. There is a separate group of stickers that fit especially well on portraits. To access them, swipe left.
Removing stickers
To remove an accidentally added sticker, tap and hold your finger on it. A trash can icon will appear at the bottom of the screen, and you need to move the extra “sticker” there.
Drawing
To start drawing, click on the corresponding icon between the sticker and text icons in the story editing window.
Types of brushes
The user has four brushes at his disposal.
- Regular brush. The same basic brush from any graphic editor.
- Marker. It differs in the shape of the brush and the degree of transparency.
- Brush with a “neon” stroke. Similar to a regular brush, but with a choice of stroke color. The main color remains white.
- Rainbow brush. One brush - seven colors.


A choice of eraser is also available.
Brush size
The brush size is adjusted using a special slider, which opens by clicking the three-dot icon in the lower left part of the screen.
Color selection


When painting, you can also select brush colors: they are located at the bottom. You can move between three standard palettes by swiping left or right. To choose your color, hold your finger on one of the circles.
Fill
To fill the frame with one color, select a brush and press and hold your finger anywhere on the screen. After filling, you can open part of the photo or video using the eraser.
Text
To start typing, select the "Aa" icon to the right of the drawing icon.
Styles and Alignment
To adjust the color and size of the text, you need to follow the same steps as when drawing with a brush. The scale of what is written can also be changed using two fingers.
In the upper left corner, when typing, a button with indent adjustment appears. You can place the inscription on the left, right or in the middle. The second functional button when typing is the letter A in a square. By clicking on it, you can switch between three styles of displaying the inscription.
Volumetric text effect


To give the text a volume effect, create two identical inscriptions, but different colors. Place them almost on top of each other, with a slight shift: you get 3D text.
User mark
To tag someone in your story, type the @ symbol when creating a caption. Start typing a nickname and Instagram will suggest suggestions from your friends. You can attach hashtags in much the same way: use the # symbol.
Other
Saving stories
Click on the three dots in the upper right corner when you are in your Instagram profile. To have your stories saved automatically, go to your stories settings and move the “Save posted photos” slider to the active position.
Adding Music to Instagram Stories
There is no option to add musical accompaniment to videos in Instagram Stories. But there is still a way to add audio to a story. Many may have noticed that the music playing on your smartphone is not interrupted when viewing other people's stories. The same thing works when creating a video: just turn on the song on a streaming service or, for example, on the VKontakte social network and start filming the story.
Rotate video
You can avoid cutting off the edges of the video when posting to history using special applications, rotating the video 90 degrees.
Publishing old photos and videos in history
If you are late with the publication and 24 hours have already passed since the shooting, a little trick will help you upload a photo or video. Just send the desired pictures or videos to yourself on WhatsApp and save. There is an easier way - using special applications.
Publishing long videos
To post a video longer than 15 seconds in your history, use any video editor. You can delete some sections, split the video into several parts, or increase its speed. For iOS device users App Store offers an application that automatically divides a long video into several 15-second segments.
Materials used
The short lifespan allocated to this type of publication requires the use of only relevant materials. In other words, the history may include photos and videos created by the user himself over the past 24 hours. You cannot post a video shot last year or photos from childhood. Music is also not included in the category of permitted materials.
Settings
Now that we know what goes into a story, let's set up our own. The interface of VK mobile applications for Android and iOS differs in many ways, but in this case it is almost identical.
- On the news page, in the upper left corner there is a stylized camera icon. It is designed to create this type of plot.

- Having launched the program, we see an interface that is in many ways similar to camera control. The icon in the lower left corner provides access to the latest photos and videos. To create a story, you can use them or use the camera in real time. Expanding it using the indicated button, we select shooting ourselves or surrounding objects. A single click will add a photo. While holding down the center button, we record a video, and the ring around it will be filled with color. The average video length will be 15 seconds. You can turn off the sound when recording videos.


- The second section regulates the ability to discuss the posted story. You can't attach a poll to it or send it to the community, but the comment settings are quite flexible. You can select a specific group of friends or make the discussion available to all Contact users.

Having studied general settings and having selected publishing options, move on to the next step.
Creation
Posted materials can be pre-processed before being sent to the network. Let's look at what capabilities the built-in editor has.
- We take the first photo with our phone. We have new controls, using which you can give it an emotional coloring or immediately put it on the page.

- Let's use the tools located in the left corner of the screen. By adding text, a picture and a sticker, you can create an attractive and memorable image. To publish it, click on the arrow button.

- When adding a selfie as the next element of the story, you can use a mask. Some of them transform the user beyond recognition and can cheer up your friends.


- A blue circle around the outline of the photo indicates that the publication contains new materials that have not yet been viewed.

Within 24 hours from the moment of posting, the publication created in this way will be located at the top of the news feed.
Control
The peculiarity of the story is that you cannot publish pictures or videos in a whole series. After posting the first photo, you can add the next one to it by running again full cycle the operations described above.

- You can save the piece you like to your iPhone, and delete the unsuccessful materials. You cannot erase a story if there are too many elements in it or you change your mind about posting it in one motion. This function is not provided. You will have to use the method described above to delete each fragment. With the latter, you will completely erase the post and it will disappear from the feed.

- As we know, you can create a publication only in mobile application, but viewing and editing functions are available on PC. When you open your page on your laptop, you will see the story at the top of the news feed.

- The control interface is completely similar to the mobile application. It is possible to send in a private message or edit.

- A warning window will appear when deleting. Despite the menacing content about the irreversibility of actions, in the desktop version it is also impossible to delete the story with one click. Only the element that is in at the moment displayed on the monitor.

If desired, you can introduce a “division of labor.” Create a publication in the mobile application and edit it on your PC.
In conclusion
With these instructions, you'll be up and running with this feature in no time, and you'll be able to use it to spice up your interactions with friends.
Video instructions
If you still have questions regarding publishing stories on VK, watch the video below. The entire process described is shown clearly, and perhaps you will find the answer you need there.
In the Instagram section, we considered an interesting question regarding stories on Insta, or, as they are also called, stories. Our next material will tell you about how to add photo to instagram story. In the previous article we already touched on this topic, but today we will consider it in more detail and carefully, trying to highlight the most important points and nuances. Read us - it will be interesting. Without a doubt, Instagram stories are a great innovation that is designed to interest absolutely all users of the social network. The plots will help you show off all your talents and directing skills. Obviously, interesting stories will attract even more followers to your account. If this does not happen, then you need to increase your army of admirers. Now let's, as they say, get closer to the point. So, you've decided to create interesting story one fun day in my life. To realize your idea, open the Instagram application on your mobile device.
On the main page of the application you will see a camera icon. Tap it as shown in the first screenshot above. As always, in such cases the camera on the phone turns on. Now you need to take the intended photo. To do this, tap the shooting button, as shown in the screenshot number 2 above. You also have the opportunity to make an interesting video by swiping the screen to the right. After you take a photo, the application will redirect you to the next screen (3 - in the picture above). As you can see, two icons have appeared at the bottom of the screen. You need to touch the icon that says: “To history.” We showed this schematically in the last screenshot of the top figure. That's it, now your photo has become an integral part of the plot.
With one photo everything is clear. Now the task is add several photos to Instagram story, because the more beautiful shots, the more interest your story will generate among subscribers and friends. More moments means more likes, respectively. You can get any number of likes with one click here: . It is not yet possible to somehow select many photos in order to upload them into a newly created story in one motion. But don’t despair, because you can add several frames one by one. This will take some time, but at least you will be able to think carefully about what to include in today’s story, and what may not be worth sharing with your followers. At the very beginning of the publication, we added one photo, thereby starting our story. Now on the main page of the application you can see your history (screen 1 in the bottom picture).

By touching history, we enter into it. Now, by analogy with adding the first photo, we add the following ones. We take a photo, touch the icon: “Add to history” (second picture above) - the photo is added. We take another frame - add it to the plot and so on. We can add a lot of photos to our story using the described method.
We sorted this out too. Now we need to understand whether it is possible add old photo to Instagram story and how to do it. Let us remind you that stories are designed so that they “live” only 24 hours. For this reason, it is possible to add only new photographs to the plot that were taken no more than a day ago. Sometimes you just need to decorate your story with an “old” photo, so the relevance of this issue is beyond doubt. To add a photo you took earlier, swipe from top to bottom in the active camera mode in Instagram history. A window will open with thumbnails of photographs taken over the last 24 hours (everything will become clear to you if you look at the bottom picture).

The first thing that comes to mind is to do new photo or a screenshot of an existing one. Find how to take a screenshot (snapshot) of the screen specifically for your smartphone model on the Internet. iPhone owners must press the lock and home buttons at the same time, as shown in the bottom picture. Owners of Android phones must hold down the lock button along with the volume button (in most cases). After that, your screenshot of the old photo will become a new, just taken photo, and you can add it to the story.

Another option for adding an old photo is to change the date. The third option is a third-party application called: “Storied For Instagram”. It is worth mentioning that this application is paid, and will not suit everyone, but, as an option, it may come in handy. To make your stories more lively and creative, add music to your videos. How to do it.
If you don't want to publish a lot of stories in the form of photos on Instagram, but... post several photos at once in one story, then without third party applications you can't get by. You won’t be able to do this on Insta itself, but various photo and video editors will come to your aid.
Method one: flipagram
A flipagram is a video in which several selected images are scrolled through. You can do it in the application Flipagram- just choose necessary photos and form them into one video recording no more than 13 seconds long (this is a limitation on Instagram; more will not be uploaded to stories anyway).
The duration of display of each photo can be changed. You can also add music to the video.

Flipagram now is also like social network. You can search for friends there and send flipagrams to your feed. However, remember, in order to publish your video on Instagram stories, you will definitely need to save it to your phone gallery first.

After that, follow Instagram, go to stories and select files that appeared in the phone’s memory over the last 24 hours. You can click on the gallery icon in the lower left or swipe up on the free part of the screen.


All that remains is to add filters, stickers, place, time, if necessary, and publish your story.
Method two: picture collage
Several photos in one Instagram story can be shown using a collage. To create it, use any application convenient for you, there are a lot of them now: just type in the search Google Play or App Store “photo collage” and install the one you like. We will look at how to make a collage for Instagram stories using the Pic Collage application as an example.
You need to remember two points: you need a collage in portrait orientation (a vertical picture, that is), and your result, just like in Flipagram, will need to be first saved to your phone’s gallery, and then added to Instagram stories.
In Pic Collage, I did portrait orientation in Free Form mode.

Choose the desired collage according to the number of your photos, add them, change the frames and background if necessary, apply stickers.


Only after this will it be visible in stories.

In general, why bother so much? Isn't it easier to post several photos as several stories? Although the owner is a master, as they say.
Instructions

