If you need to register for Skype again or replace your old one with a new one, this information is for you!
What is needed for a new registration?
Before you re-register as a new user in Skype, there are a few things to clarify important points:
- Registration must be carried out each time for a new email(to do this you need to create Skype again).
- The login used the previous time will remain with the previously created account, so you won’t be able to use it a second time.
- The email address (as well as all other data entered during registration) must be entered (typed) into the appropriate fields of the registration form, and not copied.
- You need to create a new account using a real email address, the password for which you know (you remember it).
- Registration in the system is always free.
- Download the program in advance from www.skype.com/ru/ in Russian, if it is not already installed on your computer (after that, do not forget to install it).
What should I do to re-register?
The following instructions are for those who already have an account Skype recording a (), but for some reason it needs to register a second time under a different login (nickname, nickname):
- Exit completely from the messenger. To do this, it is not enough to click on the red cross in the upper right corner of the program window. Do the following: at the bottom right (in the tray), find the blue Skype icon, right-click on it and select “Exit” from the menu that appears.
- If a user already registered in the system has opened the program, you can click on the “Skype” menu and select the “Exit” command.
- If the program is not running, run it; if it is running, go to the next step.
- Click "Create a new account."
- Enter all mandatory (marked with an asterisk) registration data, read (if you have not already read) the terms of cooperation (rules and confidentiality agreement, as well as on use cookies).
- Click the button at the bottom of the “I agree” page to complete registration.
How to switch between accounts?
It will be possible to use two (or more) instant messengers at once only when the user can install the program on his computer (or other device that supports the operation of this program). To switch to another account, a “switch” is required:
- Log in to Skype.
- Click on the main menu – “Skype”.
- Select the very last item “Properties”.
- Find the field called “Object” and make changes to it: add “/secondary” at the end.
- Click OK.
Re-registration via the website
To re-register and log into the program:
- Go to login.skype.com in your browser.
- Click on "New Account".
- Fill out the fields in the registration form that appears.
- Create and enter a new username and password.
- Enter the captcha (numeric or alphabetic code from the picture), which is protection against bots.
- Click the “I agree, next” button to confirm your agreement to comply with the rules for using the service and proceed to complete registration.
- Go to your email account and follow the link that is in the letter from the Skype administration (team).
As you can see, re-registering for Skype is not that difficult. You can use several accounts, switching from one to another.
Skype is free application, which allows you to make voice and video calls, share files, and create video conferences. In order to use Skype, you will need to sign in to the client using account Microsoft, Facebook or Skype login. Below you will learn how to register for Skype correctly by following a few simple steps.
Registering a new Skype user via computer
To register for free with Skype, go to the official website (https://www.skype.com/ru/) and click on the “Login” button in the upper right corner.

You will be directed to the registration menu. By default, Skype prompts you to register using your mobile phone. In this case, you just need to enter your mobile number and come up with a password, after which an SMS with a confirmation code will be sent to your phone, which you will need to enter in the next window. If you do not want to use your mobile number, consider the 2nd option - registration using email address. To do this, click the “Use an existing email address” link.

You will be directed to a page where you will need to provide your email address and create a password. After entering these data, make sure they are correct and feel free to click “Next”.

Advice: A strong password always contains uppercase characters, numbers, and special characters. Also, it should not be duplicated in other accounts.
In the next registration window you will be asked to enter your first and last name in Russian. In addition to your real data, you can enter a pseudonym that you have created.


Open this email and find the verification code.

Copy and enter it into the appropriate field of the registration procedure, then click “Next”.

After a few seconds, the registration of a new user on Skype will be completed and you will be automatically redirected to the web version of the client. Now you know how to register for Skype, and you can fully log into your account from any device where the client is installed.
Note: If you have already installed the Skype client, you can register using it. Simply click “Create Account” and the above steps will be displayed directly in the client itself.

How to register for Skype using a phone/tablet?
To register for Skype from a tablet or phone running Android OS, you need to use the number mobile phone. To create an account, download the Skype client from the Android Play Store and launch it.


You will be asked to enter your phone number and create a password for your account.

Fill in the required fields and click “Next”. An SMS with an activation code will be sent to the specified number. Enter it in the appropriate field and proceed to the next step. 
In the last window you need to enter your first and last name. After this, the Skype account will be successfully created and the client will automatically sign in.

Adding additional information
By creating a Skype account, you can add additional information about yourself so that others can easily find you. You can do this on your account page, which will open after clicking on the “Login” button.
Scroll down the profile window and click on the “Edit personal information” link.

Here you can add a photo, contact phone numbers, country of residence, city, date of birth, as well as additional email addresses.

By providing all the necessary information, in your opinion, you will be able to fully use the Skype client on your laptop, phone, tablet and be always online.
Need to contact someone who is far away? Whether it's a relative, a friend, a new acquaintance or even a business partner, use Skype! This application is specially designed for such purposes. It is quite easy to learn and is suitable for absolutely all users. You just need to register with Skype online.
With this application you can make regular and group voice calls completely free of charge and no matter where you are! At the same time, you can use the application on any convenient device: smartphone, tablet or computer. Registration in Skype online can be done from any of them, which is also a definite advantage, you just need to use mobile internet or connect to Wi-Fi. In addition to its main purpose, the program allows you to transfer files, conduct personal correspondence or chat by creating a group. So, you can learn how to register for Skype online from this article. We will try to answer the most popular questions and understand the nuances of use. Despite the fact that the program interface is understandable to most users, some may still encounter certain difficulties.
Features of operation
Skype registration may cause some difficulties for an inexperienced user, but our task is to tell you everything in detail and save you from a number of intrusive questions.
Registering an account with Skype is possible on the following devices:
- Computer or laptop.
- Smartphone;
- Tablet;
We will tell you about each option in detail.
Registering a new Skype user has important advantages:
- Is absolutely free.
- There is no need for specific “invites” or other hassles - the system is open to everyone.
- Registration does not take much time, is consistent and quite simple.
How to register for Skype?
Using Skype on a PC can be a lot of fun, but first things first.
- Before entering the application, you need to register, in other words, create a new account
Although it is much more convenient to log in using your account Microsoft entry, so that things go even faster, or even Facebook.
The procedure for registering on Skype with a login here is the same as everywhere else:
- Enter your personal information – first name, last name, contacts.
- A code will be sent to the specified number to confirm your actions.
If something remains unclear to you, then you can look at how to correctly complete registration on Skype.
How to register on a smartphone?
How to always have the messenger at hand? Very simple!
- While in the browser on your phone, in order to register, enter the address of the official website of the messenger. You can download the installation distribution either from Google Play or directly from the website.
In our example, we decided to use the installation method from Google Play.
- A code to confirm your account will be sent to the specified number almost instantly. Enter it in the required field.
- Then “Adding information” - first name, last name.
- Now you see that when you register, Skype plans to add contacts from your phone book.
- The main menu will look like this.
Get to know the amazing settings and capabilities in more detail, and get started with personalization. You'll also get some useful guidance from Skype's proprietary robot assistant.
So, you managed to register on Skype for free in Russian. We continue to improve our skills.
Registering an account and logging into Skype on your tablet
The tablet is ideal for using the video calling option, which is why Skype is often installed on this gadget.
- You can download the installation file on Google Play (for Android) or on the AppStore (for iPads), as well as on our website
Android (minimum version 4.0.3, but it is better to update it to the latest)
iPad (iOS 8 and later).
- Launch Skype and go straight to registration, to the “Create an account” section. You can use either a phone number or email.
- Account confirmation will look the same as in the case of a smartphone, then you can immediately begin communication and additional settings.
Important: Don't forget to give the application access to the data it will ask for. This is a standard procedure when installing any software.
Skype: registering a new user
Creating a new user account is not at all difficult, to do this:
- First, log out of your active account;
- A new registration/login window will appear in front of you;
- To register a new user, you need to select “Create an account.” And, specifying the new account information, create a new account.
And our article on this topic will help you do it!
How do I re-register for Skype?
Circumstances may turn out differently, so you may need to create a second account and register on Skype again. So, the algorithm.
- Log out of your previous outdated Skype profile.
- When launching the application, select “Create an account” rather than “Login”.
- But now you need to provide completely different data - a new email or a new phone number.
In addition to all of the above, you can always use the web version of the messenger if you need to quickly contact someone via Skype, and there is absolutely no time for registration. But this is only suitable for one time, because if a person wants to continue communicating with you, he will probably prefer to have a permanent contact in his address book, so registration is the best option.
All methods, see another article.


Registration on Skype is not difficult, but for novice users it often causes difficulties. Therefore, I made very detailed instructions.
Registering for Skype on a computer or laptop
Let's go to official page Skype in Russian: https://www.skype.com/ru/
Skype home page in Russian
On the main page, in the upper right corner there is a Login button. Press this button.


In the window that opens, enter your mobile phone number. You can enter an address instead of a phone number. To do this, click the Use an existing email address link.

Another window will open in which you need to enter your mailbox address. It must be working, because the code will come to it. Click Next.

Then you need to come up with a password, at least 8 characters. In this case, the characters should not be of the same type (for example, only numbers), but belong to different categories (English letters large, small, numbers, signs). If the system does not generate a password error, click Next.

Enter the First Name and Last Name in this window and click Next.

Checking mailbox, which you indicated at the beginning of registration, find email with a four-digit code. Enter the Code in the box and click Next.

If you did not specify an email, but a mobile phone number, then a different window will open. Enter the code received via SMS into it and click Next.

Finally, we have reached the point of completing the registration of our account. Now you need to figure out what kind of signs are drawn in the picture. I usually look at them with a magnifying glass. Disassembled? Did you write it in? Click Next.
You are now registered in the system. Write down your login(phone number, or email address) and password in a notebook. You only need to create your account once. After this, the data you provided during registration will be stored on the Skype server and will not be lost anywhere, no matter what happens to your computer.
Thanks to your username and password, you can log into your Skype account from any computer, tablet, or smartphone on which Skype is installed. And immediately contact your friends.
But, it is better to communicate not through a browser, as in this case, but to install the Skype program. It is much more convenient to communicate through it. And all contacts and chats are saved. Where to download the Skype program - more on that below.
How to register for Skype on your phone
Creating a Skype account via phone is more convenient than via desktop computer, or laptop. I will show you step by step how to register for Skype from your phone (Android smartphone).
1. Go to PlayMarket

Go to PlayMarket. Enter the word “Skype” into the search window.
2. Select the line with the Skype logo

Several lines with the word "Skype" appear. The first line will be with the program logo. Click on this line.
3. Click Install

The page will open Skype programs V Play Store. Click the Install button.
4. Click Open

The program will take some time to install. When the Uninstall and Open buttons appear, it means the program has been installed. Click on Open.
5. Click: Create account

At this step, users who have previously registered with Skype via a PC or other smartphone can click Sign In, enter their credentials and start communicating. And those who have not yet registered on Skype click: Create an account.
6a. Registration in Skype with phone number

Select the Country, enter the mobile phone number, and click Next.
If, for some reason, you do not want to link your account to a phone number, then, under the Next button, click: Use an existing email address.
6b. Registering on Skype without a phone number

In this case, enter the address of electronic mailbox 1 (it must be working, because a confirmation code will be sent to it). By the way, look how free it is. Click Next 2
7. Enter the password

We come up with strong password and enter it in the password field 1 and click Next 2. If you enter a weak password, you will be prompted in red font to tell you that the password must be at least 8 characters that are at least two of the following types: upper and lower case letters, numbers, and symbols.
8. Enter your first and last name

At this step, enter your first and last name, in any language.
9a. Enter the code received via SMS

If you indicated your mobile phone number, then enter the code received via SMS and click Next.
9b. Enter the code from the letter

If you specified an email, then enter the code that you received in your mailbox 1, click Next 2
10. Enter the code from the picture

We complete creating an account on Skype. To confirm that the account is being created by a person and not a robot, enter the code from the picture, click Next, and you will be taken to your Skype account.
You will be asked to select a theme and make other settings. You are now registered with Skype and with these registration details (I think you have written them down) you can log into your account from any computer, laptop, tablet or smartphone.
Video: Register for Skype right now
Video from our Virtual Computer Academy. In this video tutorial you will see how to independently register your profile on the Skype server, how to install Skype program on a computer, how to adjust the sound, how to show the screen of your monitor to your interlocutor.
Where to download Skype in Russian for free
Do not download Skype from third-party sites! You can download the latest version on the official website of the program, on the main page: https://www.skype.com/ru/
 Where to download Skype in Russian
 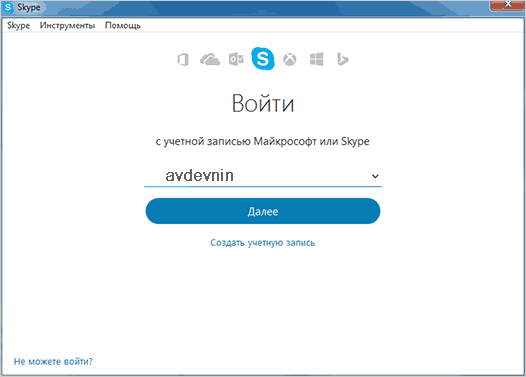 After installation, the Skype login window will appear. By entering your login and then password (which you specified when registering your account), you can start communicating with your friends.
Equipment list
Review the list to make sure you have everything you need to use Skype. You will need:
- High speed internet connection: for example, via DSL, satellite or cable internet. A dial-up connection is sufficient for instant messaging, but not for voice or video calls.
- Speakers and microphone(built into the computer or connected separately). Some people prefer to use headphones or even a headset to hear sounds more clearly.
- Webcam for video communication. Many modern computers have built-in web cameras. If your computer does not have one, you can purchase a webcam separately.

There are other accessories you might be interested in, such as a desk phone that you can connect to your computer (using a cable or wireless connection), and talk on it via Skype. These accessories can be expensive, but they are a good investment if you plan to purchase your own Skype number and use it frequently. To learn more about similar accessories, visit the Skype Store page.
Windows or Mac
There are two Skype versions: for computers with operating system Windows and computers Mac.

We'll focus on Skype for Windows, but Mac users no need to worry. The functions of both versions are almost identical. Once you know the interface of the Mac version, you can follow and try all the actions that we will talk about in this tutorial.
Download and install Skype
The initial installation of Skype will take you a few minutes. But you should start by registering an account on the Skype website. Then you need to download and install the application, and run installed Skype on the computer.
To sign up for Skype:
- Go to Skype.com/ru and select sign in in the top right corner.
- Then click Join in the top right corner.

- A window will open with a new user registration form. Fill in the required information, starting with your name and email address.

- The next part of the form includes large number information entered at your request, for example, date of birth, gender, etc. All information you enter will become part of your profile. Therefore, be careful when entering, because this information will be available to other Skype users.

- Enter your desired username, also known as Skype Login. If the name you enter is already taken, Skype will give you some options.
- Enter the desired password and repeat it in the second field. As for anyone online service, in Skype it is important to use a strong password that is difficult to guess. When you enter your password, Skype will tell you if it's not strong enough.

- When everything is filled out, enter the text from the image in the special field. (To prove that you are a real person and not a spam program.)
- If you're not too lazy, read the terms of use and Skype's Personal Information Protection Declaration, then click I agree - Next.

- Your Skype registration will be completed and you will be redirected to your account page on Skype.com. Click Download Skype for Windows.

- Downloading will begin Skype installer. Click Save File to save SkypeSetup.exe to your computer.

- Once the download is complete, run SkypeSetup.exe. Depending on your download settings, the file may be on your desktop or in some other folder; the easiest way is to launch it from the Downloads window in your browser.

- Click Launch. The Skype installation window will then appear. Change the language to Russian and click I agree - then to continue.

- On the next Skype screens will offer to install the plugin (I recommend), change the Internet search engine and home page (better uncheck the boxes) set by default. If you do not want this, please deselect the appropriate fields. Click Continue.


- Skype will end installation software.

- Once the installation is complete, a login window will open.
- Enter your Skype name and password, then click Sign In.

- Skype will redirect you to set up audio and video, as well as your profile photo. Click Continue to begin.

- On the next screen you will be able to configure your microphone, speakers and video. (You will see yourself in the video check window if you have a webcam connected. I don’t have one, that’s why the background is black). When finished, click Continue.

- On the next screen you will be able to select a photo for your profile. In our example, we will add a photo later, so click Decline to continue with the settings.

- The Skype window will appear.

If Skype does not start downloading automatically after you create an account, you can download it from the link: Download Skype
Skype window

1) Skype
In the Skype menu, you can change your account information, such as your online status, to show that you are available to talk. You can also sign out of Skype here.

The Contacts menu contains a large number of options for managing contacts. There are, for example, useful commands for importing contacts and sorting order of contacts in the Skype window.

This menu contains commands related to conversations on Skype, in other words, instant messages. The options range from viewing old messages to setting notifications based on the content of the message.

The Calls menu contains commands related to calls. If you're not sure what to do with an incoming call, go to this menu and get one-click access to features like Mute, Forward or Skip.

Use the View menu to navigate to any tab not visible in at the moment: your profile, voice messages, received or sent files, etc.

Open the Tools menu to access online games, settings Skype account. Most often you will use the item Settings… to configure sound, security, etc.

If you have a question about Skype, go to the Help menu. Heartbeat (Skype Status) can even indicate if Skype is having any technical issues.

Click on the status icon to quickly change it, or click anywhere on the panel to access the profile page.
The profile page is where you can edit your profile and control what information is public and what is private.

9) Skype Home Page
The Skype Home tab allows you to navigate to home page Skype. This is the first thing you see when you log into Skype, it is also shown in the figure with interactive buttons. Here you can see the status of updates; news and quickly jump to the contacts you communicate with most often.
The Contacts tab contains a list Skype contacts. You can click on a contact's name to open a panel from which you can call them, view their profile, see their message history, and more. For even faster access to some functions, you can right-click on a contact's name and open a pop-up menu.
11) Latest
The Recent tab contains a list of the most recent calls. You can right-click on a contact or group name to get quick access to a range of options.
How to set up Skype
Now that you've installed Skype, it's time to set up privacy, notifications, etc.
To change security settings:
Skype is social network. This means you can theoretically receive calls, videos, and messages from strangers unless you disable it in your security settings. Luckily, Skype makes it easy to keep your information safe and protect you from unwanted calls.


1) Call settings
Allows you to control who to receive calls from on Skype. If you don't want to receive calls from strangers, select only from my contacts.
2) Video settings
Allows you to control who you receive video and screenshots from in Skype. If you don't want to accept videos from strangers, select only people from my contact list.
3) Message settings
Allows you to control from whom you receive messages on Skype. If you don't want to receive messages from strangers, select only from my contacts.
4) History
Here you can control whether and how long message history is stored.

5) Web settings
These settings allow you to manage the security of Skype on the Internet. You must always have the Allow cookies in your Skype browser checked, otherwise some features will not work.
You can deselect other items, for example, show my online status.
To set up alerts:
Alerts are notifications that Skype lets you know about some event or activity, such as when someone comes online or wants to add you to their contact list. Most alerts appear at the top of the screen, so you can always understand what's going on in Skype, even if the window is closed.


Some alerts appear with sound signal. To turn it off/on, go to the Sounds tab in the same window.

To change your profile:

To learn more about who can see your profile information, visit your Skype account settings page.
We hope you enjoyed our tutorial on signing up for Skype and were able to install and configure Skype on your computer. If you have any questions, leave them in the comments.
Instructions

